Sunday, September 12, 2010

Fettuccine with Heirloom Tomatoes and Capers


I've become the master of cooking for one. I understand the lack of motivation to cook a meal from scratch when you're single, but since I so frequently am faced with this scenario, I've grown to realize that there is no reason to not make a great meal for myself. In fact, I take the opportunity make the meals I know my husband won't be crazy about when he's gone, in this situation it's anything pickled! 

When I looked over this recipe, I knew the only change I would have to make was eliminate the anchovies. Because their salty bite was out, I doubled the capers and added another garlic clove. What made me most excited for this recipe was the thin slices of garlic cloves. I'm the girl who seeks out chunks of sautéed, roasted, or even raw garlic when I'm eating! 

I love making fresh pasta, mixing the egg in with my fingers, kneading the dough, running it through the roller and then cutter, it's so relaxing to see a few simple ingredients come together as perfect pasta strands. I have a basic $20 pasta roller with two cutting options, fettuccine or spaghetti. Because the capers, tomato and garlic had some chunk to them, I chose to make fettuccine because it's thicker and holds up to chunky sauces better. 

This pasta bowl was so delicious: well balanced in flavors, light but still hearty and filling, fresh and summery. Thanks to Joanne for this selection from Live to Cook for our Symon Sundays group.

Tips and Trades:
-Because this dish has so few ingredients, use the best quality available, such as fresh organic, free range eggs and plump, juicy, vine-grown tomatoes, it will make a big difference in flavor. 
-If you're not opposed to using anchovies, but don't want to use whole fish, try using anchovy paste, available on the Italian foods aisle of the grocery store.

Fettuccine with Heirloom Tomatoes and Capers
adapted from Chef Symon's Live to Cook
Serves 1

pasta:
1/2 c. unbleached all purpose flour
pinch of salt
1 egg yolk
1-3 tbsp. water, as needed

1 tbsp. EVOO
3 garlic cloves, peeled and sliced very thin
1 tsp. crushed red pepper flakes
1 large Heirloom tomato, diced
2 tbsp. capers
5 basil leaves, torn
Salt and pepper
1 tbsp. coarse breadcrumbs (I smashed up a crouton!)

Place flour on a clean counter top, make a well in the center.
Add egg yolk and salt, whisk with fingers and incorporate flour into egg.
Add water as needed to make dough come together, it should be slightly sticky.
Knead for 5 minutes, set aside to rest for 10 minutes.
Using a pasta roller, roll into a flat sheet (I rolled on setting 3).
Use semolina flour, for dusting, if sticky.
Rest dough sheet for 5 minutes.
Run through the fettuccine cutter, set pasta aside.


Bring a pot of water to a boil.
Heat a large skillet over medium-low heat.
Add EVOO, garlic and crushed red pepper flakes.
Sauté for 1-2 minutes, until fragrant.
Add tomatoes and capers, season with salt and pepper.
Drop pasta in salted, boiling water.
Cook pasta for 3-5 minutes, use tongs or a pasta spoon to transfer directly to skillet with sauce.
Add basil and toss pasta and sauce.
Plate, top with breadcrumbs.


Thank you to Joanne for selecting this week's recipe. You can see all of the Symon Sundays participant's pasta at their blogs.
Joanne: Eats Well with Others
Natashya: Living in the Kitchen with Puppies
Kim: Stirring the Pot

Friday, September 10, 2010

Lentil and Okra Masala


Okra season is in full swing right now, and it's dirt cheap at the Farmer's Market. In the past, I have turned to frozen okra whenever I was cooking, but it turns out fresh okra is much better. Not only is it more tender, but it seems to be less gooey. 

When it comes to food, I'm big on texture. If it's too chewy or rubbery, I can't eat it. For the longest time, I wouldn't eat peaches, only nectarines, because the fuzz weirded me out. Well, okra is a bit chewy (if it's too large, look for smaller okra), it's slimy, and it's fuzzy... but for some reason, I can't get enough! 

A few weeks ago at Whole Foods, I tried their lentil and okra masala on the hot bar, and it was delicious... but I couldn't find a recipe. What I love about Whole Foods bar is they list the ingredients on the item's name tag, so even though you don't have measurements to go by, you have ingredients. My creation of the recipe came out really well, and very close in taste to Whole Food's version. 

As I recommend with all of my recipes, this one especially is best if you taste and season as you go along. The different varieties of curry powder and garam masala will result in a different product for everyone, so the spice measurements are not exact. 

Tips and Trades:
-I buy Garam Masala from Whole Foods, Frontier brand organic, but you can also make your own to cater to your preferred taste! 
-If you're not an okra fan, you can substitute spinach, trimmed green beans, or any other green vegetable! 

Lentil and Okra Masala

1 tbsp. EVOO
1 small yellow onion, finely diced
2 garlic cloves, minced
3 c. vegetable stock
1 c. dry lentils, any variety
1 c. tomato puree/sauce
2 tsp. curry powder
1 tsp. garam masala
1 lb. okra, trimmed and sliced
Salt and pepper
Plain yogurt
Minced Cilantro
Naan 

Heat a small stockpot over medium heat.
Add EVOO, onion and garlic, season with salt and pepper.
Sauté for 5 minutes, until golden brown.
Rinse lentils, check for stones.
Add stock and lentils, bring to a simmer, cover and turn heat to medium-low. 
Cook for 25-35 minutes, or until tender. 
Add tomato sauce, curry powder and garam masala, stir well.
Add okra, stir gently to combine, add a touch of water or stock if mixture is very thick.
Cover, turn heat to low and cook for 10 minutes, or until okra is tender. 
Remove from heat, add a dollop of yogurt and cilantro, serve with warm naan for scooping.

Wednesday, September 8, 2010

Banana Nut Bread Granola


I am a vivid dreamer. Almost every morning, I can recall several of my dreams. While they're generally about fun or random things, occasionally I dream I'm at work on a busy day or am falling off a ledge of some kind. Whenever I wake up from a dream where I've been at work, I feel so cheated! I also tend to dream up creative things, like lyrics to a song or a recipe of some kind. 

This granola is a product of my dreams. Subconsciously I knew I had 3 over-ripe bananas sitting in the fruit bowl. I also was working on my grocery list in my dream, and knew I had to either make or buy granola for my husband's daily yogurt breakfast bowl. Though making it is easy, when I can get Bear Naked or Cascadian Farms Organic on sale and with coupons, it's hard to pass up practically free granola! 

So right before I woke up Saturday morning, I dreamt that I was blending the bananas to pour over oats and make granola. I swear I could even smell the granola baking in my dream, and it smelled divine! 

This granola definitely made up for all of the ledges I've fallen off. 


A few months ago, I saw this blog post on Whole Story, Whole Foods' Blog. It's about WF bananas, and the guaranty Whole Foods makes that their bananas are fairly traded and do not damage rain forests. I think they're maybe $.25 more a pound than conventional bananas, a small price to pay to ensure the farmers and land are treated well. If you don't have a Whole Foods, no worries, I have also seen Fair Trade bananas in Sam's Club as well! 


Tips and Trades:
-Don't like bananas? Try using pureed pumpkin for Pumpkin Nut Bread Granola.
- While honey is a debatable topic among vegetarians and vegans, I try to use local honey from the farmer's market where I can speak with the vendor about the practices, or use Fair Trade, Organic honey that is harvested from cooperatives. 
-Canola oil often get's a bad rap, but many dietitians swear by it as their oil of choice. It actually has 8% less saturdated fat than Olive Oil! 

Banana Nut Bread Granola

3 over ripe bananas, about 1 1/2 c.
1/4 c. honey
1/4 c. canola oil
1 heaping tsp. ground cinnamon
Pinch of salt
1 tsp. vanilla extract
4 c. rolled oats
1 c. crushed nuts (I used walnuts and pecans)
1 c. crushed banana chips

Preheat oven to 300*
Place oats and nuts in a large mixing bowl. 
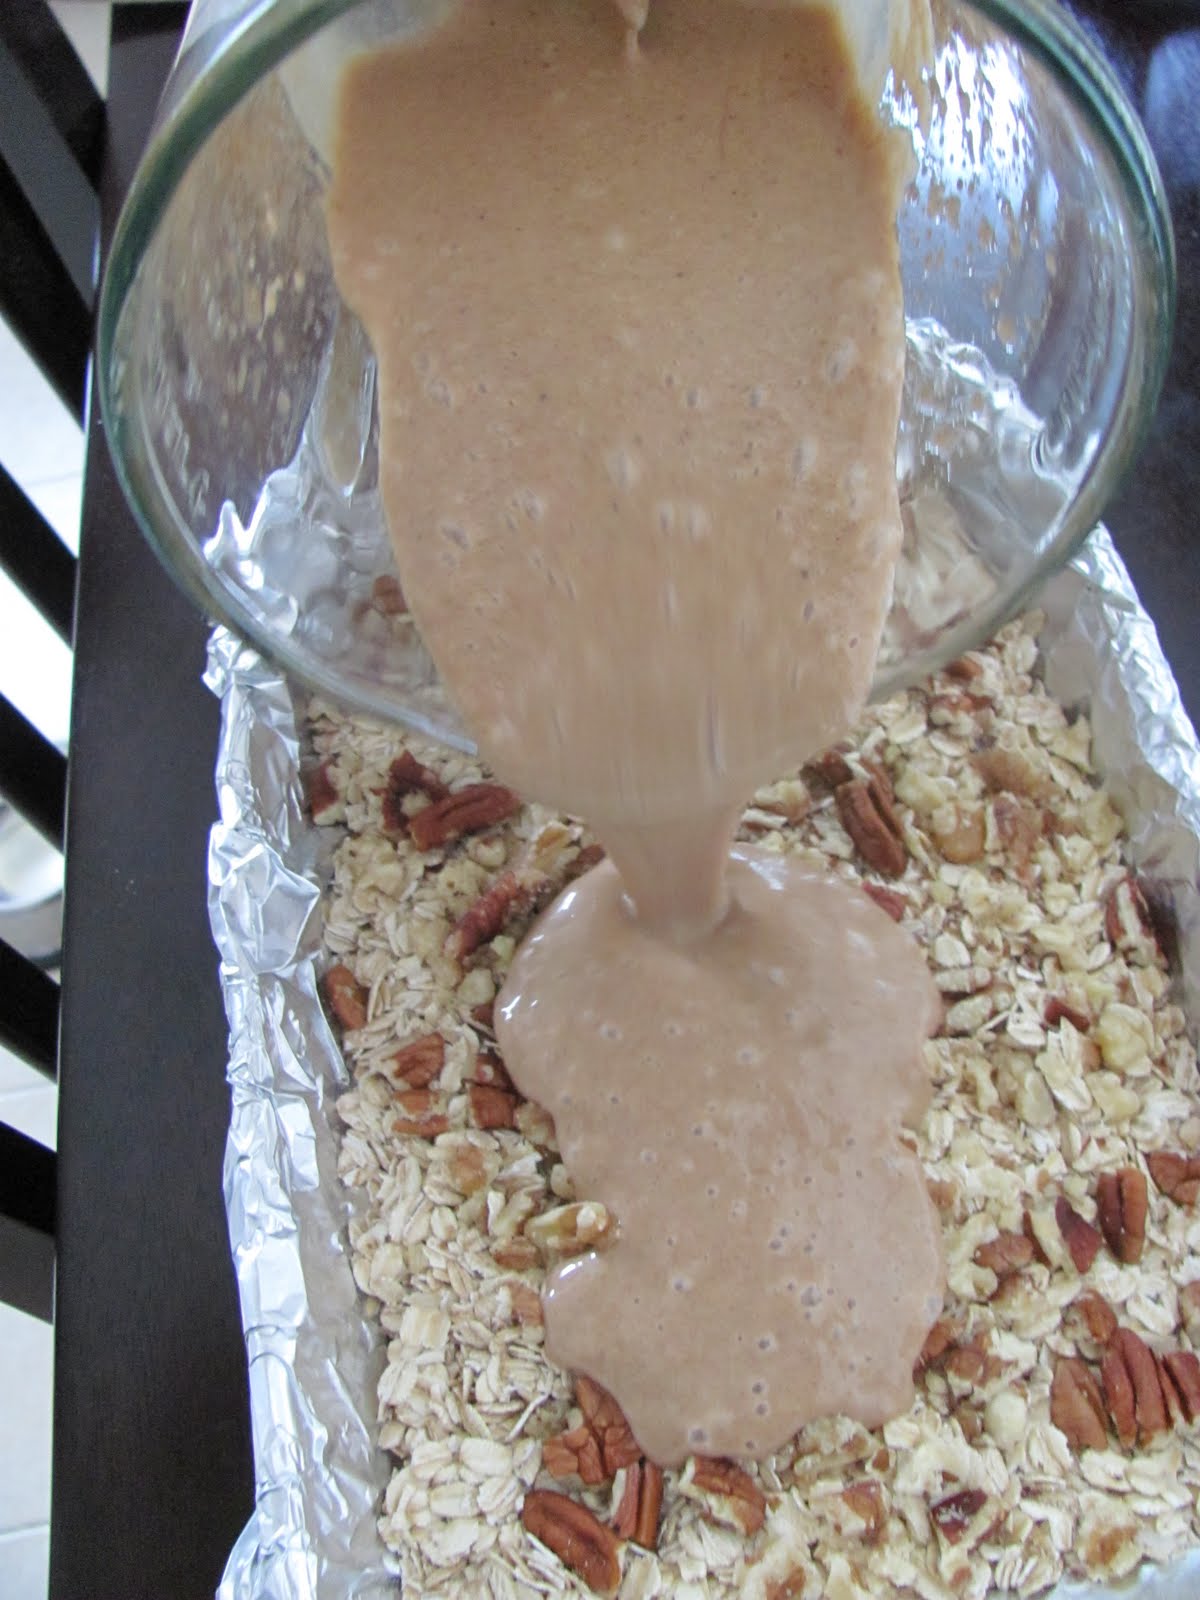
Add bananas, honey, oil, cinnamon, salt and vanilla to a blender.
Blend on high until completely pureed.
Pour over oats, mix well.
Spread out evenly on a large baking sheet 
Bake for about an hour, using a spatula to flip and toss granola around every 15 minutes (if necessary, bake an additional 15-30 minutes, if necessary).
Remove from the oven, cool for an hour.
Toss in banana chip pieces, pour into a storage container (make sure granola is very crisp and toasty at this point)
Granola will keep for about 2 weeks, if it lasts that long! 

Note: In error, I used a baking dish that was too deep, and ended up dumping the granola onto a baking sheet after the first 30 minutes of baking


Tuesday, September 7, 2010

Zucchini and Quinoa Lasagna


Toward the end of the summer months, I feel like I've maxed out on all things zucchini. I've made both sweet and savory dishes, eaten it both raw and cooked, paired with many different ingredients and cuisines, and I just don't think I can take anymore. But then I'm at the market and I can get a bucket of 6-8 for a dollar... and I can't pass it up. And I'm back to scanning the indexes of my cookbooks (yes, there's a permanent dent on the "Z" page), flipping through my summer magazines, and scanning google reader because surely, I'm not the only person in this (zucchini) boat. 

Lucky for me, Mama Pea came through for me in my time of need! I had just purchased a new bag of Organic, Fair-Trade Quinoa and had some leftover marinara in the fridge that needed to be used. I stuck with her recipe with two exceptions - she is vegan and used vegan cheeses. Instead, I used cottage cheese and mozzarella... but you could substitute mascarpone, ricotta or cream cheese. My personal favorite cottage cheese is Organic Valley 2%, it's so thick and creamy. I also added 1/2 c. thawed, chopped spinach because it needed to be used before freezerburn set in. 

This lasagna would be the perfect way to say goodbye to zucchini and summer... but when you live in Florida, it's always summer and it's always zucchini season. In fact, I found three new zucchini buds growing in my garden over the weekend. 
The search continues... 


VBS Tips and Trades:
- Choose smaller, thinner zucchini at the market. They're generally sweeter, more tender, and less pulpy. Though a huge, prize-winning sized zucchini looks impressive, it will lack flavor.
- Quinoa is what I call a hybrid starch-protein. Though it is a grain, it's similar in nutrition contents to a bean, packing in whole grain carbohydrates and lean protein.
-I used a mixture of red and regular/white quinoa in this dish for variety's sake. This is the brand I use, I find it at Whole Foods, but it can be ordered online.

Zucchini Quinoa Lasagna
un-veganized from Peas and Thank You

4 medium sized zucchini, sliced into 15 strips (make them the size/shape to fit your baking dish)
1 c. quinoa (any color)
2 c. vegetable stock
1/2 c. tomato sauce/puree
1 small yellow onion, minced
2 garlic cloves, minced
1 tsp. dried oregano
1/2 c. thawed, drained, chopped spinach
10 basil leaves, chopped
1/4 c. cottage cheese (or ricotta, mascarpone, cream cheese, etc.)
Salt and pepper
2 c. marinara sauce (jarred or try this recipe)
1/2 c. shredded mozzarella cheese

Preheat oven to 400*
Slice zucchini into strips, layer into a colander, sprinkle with salt and layer with paper towels (see Peas and Thank You for pictured steps, if needed).
Combine stock, quinoa, tomato sauce, onion, garlic, and oregano in a sauce pot. 
Bring to a boil, turn heat to low and simmer for 20 minutes, until moisture is absorbed.
Turn heat off, stir in cottage cheese, spinach and basil, season with salt and pepper.
Pour sauce in a baking dish to coat, layer with zucchini, half of quinoa, zucchini, the rest of the quinoa, and the last of the zucchini. 
Top with more sauce and cheese.
Bake for 30 minutes, or until bubbly and zucchini are tender.
Rest for 5 minutes and serve.

Sunday, September 5, 2010

Gruyere and Brie Macaroni and Cheese


I have to apologize in advance, but this post has no final product photo, only several from the making of the dish. Blame it on the fact that we could not wait to dig in. It was just that good!

Almost exactly one year ago, I joined forces with Folio Weekly to become the host and writer of the Bite Club and Bite Club Blog. When I moved to Jacksonville, I wrote to several local newspapers and magazines with the hopes of becoming an affiliated food blogger. Folio Weekly answered first, and told me they had hopes to begin a dining group but didn't know where to start. We met several times, and decided that the best way to go about it was to pick a restaurant each month, have a menu tasting meal, and then I would photograph and blog about the event. We thought a blog seemed most fitting for the group because it's in real time, it's interactive, and I had two years of blogging experience. 

The first few events went really well, and were learning experiences for me. I discovered what types of events worked best, what style of menu and service was ideal, and how to keep the focus on food. In addition to hosting the events, I also provided restaurant profiles on the blog where I would dine at a new, local place and blog about the experience and food. There were definitely perks to the job, I was invited to many events and restaurant openings, but it also took up much of my time. Of course food is my passion, but at my core, I am a home cook, and dining out isn't always feasible for my budget, schedule, and eating preferences.

One of the restaurants I was invited to was III Forks, a steakhouse. At the time I was still a once-in-a-while-meat-eater, but I've never been a steak girl. So while everyone else ordered steaks and seafood, I hit the sides, and I hit them hard! Our server told me that their Macaroni and Cheese is phenomenal, and you never have to ask my husband if he wants mac and cheese twice, so we chose to split that. The macaroni and cheese was so creamy and had a wonderful balance of flavor. I asked the server what cheeses made up the dish. I expected him to say it's a chef secret, but he gladly told me Brie and Gruyère. Those are my two favorite cheeses, without a doubt. 

So if you've noticed, I've been writing about my tenure as Bite Club host in the past tense. About a month ago, after much thought, I decided to resign from the position. It was a hard decision, but ultimately it just didn't seem right for me to be writing about the dishes we were served at restaurants when I was barely eating anything (most dishes are meat-centered). I also thought the fact that I don't eat out often and couldn't really give restaurant recommendations was a disservice to the credibility of the position. 

I told my editor and publisher, and as anyone would wish, they asked me to reconsider. I had made up my mind though, and told them I knew a perfect replacement. I met Caron through Bite Club, and couldn't think of a better host. She has practically dined at every Jacksonville restaurant, will eat just about anything, and is hugely into social media (maybe she'll even tweet this post - haha!). I invited her and her boyfriend to dinner so we could go over the position, and thought it would be fitting to make a rendition of the III Forks Mac and Cheese, one of my highlights from the past year as Bite Club host. I am sad to be leaving the position, but know it will be in good hands! 


Tips and Trades:
-Quality ingredients mean most delicious dishes. If you're making this for company, splurge on the cheese for this and choose a less expensive appetizer and salad (I made bruschetta and a spinach salad)
-Though this dish is rich, try making it with whole wheat pasta, Whole Foods has a wide variety of whole wheat shapes! 


Gruyère and Brie Macaroni and Cheese
inspired by III Forks Steak and Seafood

8 oz. whole wheat pasta, small cut or shape
4 tbsp. butter
1 small yellow onion, grated
Salt and ground white pepper
3 tbsp. unbleached whole wheat flour
2 c. 2% milk
1 tsp. ground mustard
1/4 tsp. cayenne pepper
6 oz. grated Gruyère cheese
4 oz. Brie, finely cubed
1/4 c. coarse, seasoned breadcrumbs

Preheat oven to 400*
Bring a large pot of water to a boil, salt heavily, add pasta.
Cook pasta 8-10 minutes, or until al dente.
Drain and pour into a casserole dish.
Heat a stockpot over medium heat.
Add butter and grated onion, sauté for 2-3 minutes, season with salt and pepper.
Sprinkle in flour, whisk and cook for a minute.
Add milk, whisk and bring to a light simmer.
Add mustard and cayenne, whisk.
Add Gruyère and 3 oz. of the Brie cubes, turn heat off.
Use a spatula and gently stir in figure 8's. 
When cheese is melted, taste and adjust salt and pepper.
Pour over noodles, stir to distribute.
Dot with extra Brie cubes, sprinkle with breadcrumbs.
Place in the oven and bake for 20 minutes, or until bubbly and browned on top.


Some dot their mac and cheese with butter... I opt for Brie! 

Thursday, September 2, 2010

White Chocolate Macadamia Cookies


My husband and I have very similar interests and tastes in hobbies, entertainment, sports, and food. However, where we couldn't be more opposite is our desserts of choice. 
When we were planning our wedding, he made the big decisions, such as date, place, and type of event. His only other stipulation was no pink. As the months of planning went by, I pretty much floated designs and ideas past him, and he didn't show much interest. This system worked well for us. It gave me freedom to have my "dream wedding" and it saved him from having to make decisions about the shade of red our pocket-fold invitations would be.  

As the RSVP period went by, we found that many of our guests were not able to attend because our wedding was out of town and in-between Thanksgiving and Christmas. While we expected this to be the case, we still had to meet a room minimum for our reception hall. When the final numbers rolled in, we were $500 below the minimum, so the plan was to add a few extras totaling $500. 

As my parents and I browsed the brochures and price lists, they thought adding a full champagne toast would be nice, or adding more passed appetizers. However, we had a full, open bar, so in my opinion champagne seemed wasteful. We also had plenty of appetizers and cheese/antipasto displays, so I wasn't sold on that. Finally, the owner told me there was an option of the chocolate fountain.
I was sold the second he said chocolate, but my parents and JJ weren't so sure. They thought it might be messy and people might not want to use it. I had a little "I'm the bride, and I'm putting my foot down" moment, and the chocolate fountain was selected.

Little did I know this would cause a whole new issue. JJ doesn't like chocolate. At this moment, I was unsure our church mandated pre-marital counseling did it's job. How did I not know this? How could I go on with this marriage. As I voiced my concern, he backtracked a little, and said he likes White Chocolate. Oh please, white chocolate is not chocolate! 

We spent the next week arguing over whether the chocolate fountain would be dark (my choice), milk (what I thought was a compromise) or white (JJ's choice). In the end, the decision was made for us because the reception hall didn't have White Chocolate in stock, and their source is in Europe, leaving us with too little time for it to arrive. Milk chocolate was our only option. Victory was mine! 

(This is literally the only photo I've ever seen with the fountain!)

Fast forward to our wedding day. When we arrived at the reception hall for photos, I cracked open the door to look before our guests arrived. I was smacked in the face with the most glorious scent of flowing chocolate. In an instant, I knew I made the right decision. And during and after the wedding, the chocolate fountain was one of the most talked about things from the wedding. And just as I suspected would happen, neither JJ or I had the chance to try the chocolate. 


So this brings me to these cookies. When I was at Trader Joe's in Cincinnati, I specifically grabbed a couple of bags of Macadamia nuts to make JJ these cookies for his birthday. I also sourced out my favorite white chocolate - Green and Black's Organic Madagascar Vanilla White Chocolate. It's seriously amazing, the only white chocolate I will eat. Hurts to say, but even better than the wonderful white chocolate my sister would bring back from Switzerland. 
I guess in the case of our marriage, when it comes to chocolate, opposites attract! 

VBS Tips and Trades:
-Green and Blacks is widely available, however if you can't find it, substitute another high quality white chocolate. If you buy baking or melting chips, the chocolate will most likely be waxy and flavorless.
-Find inexpensive, Fair Trade vanilla here!


White Chocolate Macadamia Chunk Cookies

1 c. (2 sticks) of butter, softened 
1 c. packed light brown sugar
1/2 c. organic pure cane sugar
1 tsp. Fair Trade Vanilla extract (see tips and trades)
2 free range, organic eggs
1/2 tsp. baking powder
1 tsp. baking soda
1/2 tsp. salt
3 c. unbleached, all purpose flour
1 3.5 oz. bar Green and Black's Madagascar Vanilla White Chocolate
1 c. chopped Macadamia nuts

Preheat oven to 350*
Cream butter and sugars in the bowl of a stand mixer.
Add vanilla, mix, add eggs one at a time, mix.
Scrape down sides of mixer.
Add baking powder, soda and salt, mix well.
Add flour, nuts and chocolate chips.
Turn mixer on low, speed up as flour is absorbed, and mix until just incorporated.
Line baking sheets with silpats or parchment.
Scoop cookies out by the tbsp. full.
Bake for 12 minutes, or until just browned.
Cool on the pan for 5 minutes, then place on wire cooling racks until cookies are at room temperature.

And though JJ believed he chose the colors, my secret agenda of pushing him towards "red and silver with black accents" was really scarlet and grey. So as we embark upon the 2010 Ohio State Football season tonight, I say to all my Buckeyes, "O-H..."

Wednesday, September 1, 2010

Minced Cauliflower with Peas


Cauliflower is one of my absolute favorite vegetables, and one of my husband's least favorite. Now that we're going into his busy season, I'll be eating many dinners alone. If you've been very observant in the past, I'm sure you can follow the pattern of his work schedule by what we/I eat! Cauliflower's peak season is December through March, but I've never seen it at the Farmer's Market. However, organic has been cheaper than normal at Whole Foods, so that's what I went with. 

Peas are a freezer staple for me not only because they're one of my favorite vegetables, but because they are quick cooking, and add a bright, fresh punch to any recipe. My brand of choice is Cascadian Farms Organic Frozen Peas, they always have coupons floating around, and they're only pennies more than conventional frozen peas. I served this dish with naan and spiced chickpeas for a complete meal, and made a sort of burrito, but it would be great over rice with big chunks of tofu. 

Do you have any favorite cauliflower dishes? 

VBS Tips and Trades:
-Garam Masala is a mixture of Indian spices. Try making your own with spices on hand rather than buy a bottle. Here is a simple recipe!
-To grate your cauliflower with ease, use a food processor fitted with the shredding attachment. You'll finish in a fraction of the time! 

Minced Cauliflower with Peas/Gobi Ka Kheema
adapted from Food For Thought (retired blog)

1 head of cauliflower, cleaned and cut into small florets
1 tbsp. EVOO
1 small yellow onion
2 garlic cloves
2 bay leaves 
1 tsp. ground cumin
1 c. tomato puree
1/2 c. peas 
1 tsp. garam masala (or less, to taste)
Salt and pepper
Greek Yogurt
Cilantro

Fit food processor with grater attachment.
Run all cauliflower through.
Heat a skillet over medium-high. 
Add oil and cauliflower, season with salt and pepper.
Replace grater attachment with a blade, add onion and garlic, pulse to chop, then run to mince.
Add the onions and garlic to cauliflower.
Toss and brown vegetables, turn heat to low.
Add bay leaves, cumin, tomato, garam masala and more salt and pepper.
Cover and cook for 10 minutes.
Taste, adjust seasonings, add peas, remove from the heat.
Spoon into a bowl and serve with greek yogurt and cilantro.

Tuesday, August 31, 2010

Black Bean and Plantain Patties with Peach Salsa


We consume beans often in our home, they're so versatile and of course, are a pantry staple for most people. Even though I can get a can of organic beans at Whole Foods for $1, buying a bag and cooking them myself is much cheaper... we're talking pennies! At least every other weekend I try to buy a bag of organic (and Fair Trade, if possible) beans and cook them in the crock-pot for a few hours. Then I store them in little zip-lock freezer bags (which I re-use when I cycle them in and out!) and have little bags of cooked beans at my disposal. Not only does this cost less, but it also means my waste is one plastic bag rather than 4-5 aluminum cans per week. 

Usually I under cook my beans just a bit because when I use them later on, they are re-cooked and I don't like mushy beans. The only time this plan backfires on me is when I make bean patties or burgers. When I made these patties, the beans were a bit al dente, and were probably the reason they didn't stick together quite as well as I had hoped. 

I changed the recipe a bit from the original, which I found on Two Blue Lemons. It is suggested you use a ripe plantain, but I recommend using overly ripe plantains. I took half of my large plantain and mashed it to help work as a binder in this vegan recipe. Then I diced the rest so there would still be nice chunks of plantain strewn through the patties. I dredged the patties in a tiny bit of cornmeal to add a crunchy crust. Finally, because peaches and on their way out of season, I made a fresh peach salsa rather than an avocado one as the recipe is written. 

Though the patties did hold together, I would make one change for the future, and I do plan to make these again! As I do with many bean patties, I would puree half the beans completely and mix them with the mashed plantain, then fold in the diced plantain chunks and whole beans. 


VBS Tips and Trades:
-One of the additional reasons I do not buy canned beans is because of the BPA threat, a toxic chemical in plastics #7 and some canned foods. BPA keeps the can's lining from breaking down. Many companies are making an effort to get rid of BPA, including Eden Organic. The most common canned item containing BPA is tomatoes. It's best to choose glass or tetra-pack (these, for example)  
-When choosing your plantains, look for ripe ones that have many black spots and look overly-ripe. If they're green at all, the plantains will be hard to peel, and won't be mash-able. 

Plantain and Black Bean Patties
adapted from Two Blue Lemons

Patties:
2 c. black beans or 1 15. oz can drained and rinsed
1 plantain, 1/2 c. mashed, 1/2 c. finely diced
1/4 c. minced red onion
1/4 c. minced cilantro
1 garlic clove, minced
Juice of 1 lime
1/2 tsp. cumin
1/4 tsp. cayenne pepper
1/4 tsp. corriander
Salt and pepper
1/4 c. cornmeal

Peach Salsa:
1 large peach, washed, pitted and finely diced
2 tbsp. minced red onion
2 tbsp. minced cilantro
1/2 c. finely diced tomato
Juice of 1 lime
1 jalapeño, finely minced
Salt and pepper

Add half of the beans and half of the plantain to a food processor, puree.
Pour into a mixing bowl, add remaining black beans, plantain, red onion, cilantro, garlic, lime juice, cumin, cayenne, coriander, salt and pepper. 
Chill for 10 minutes.

In a small mixing bowl, toss together salsa ingredients, place in the refrigerator.

Heat a nonstick skillet over medium heat.
Spray a small, round, flat dish (or a burger patty maker) with nonstick spray, dust with cornmeal, spoon 3/4 c. of mixture in and form into a patty. 
Place on the skillet, repeat to form about 4 patties.
Cook for 5 minutes, check for a deep golden crust, carefully flip and cook for an additional 4-5 minutes.
Plate, serve with peach salsa and plain Greek yogurt or sour cream and a sprinkle of cilantro. 


Monday, August 30, 2010

Caprese Fried Egg Sandwich with Shasha Sauce


There aren't many sandwiches I'm willing to put on a pedestal. Chef Symon really hit the nail on the head with this one. The balance of flavor is perfect, and it really is appropriate for breakfast, lunch or dinner. It can be difficult to find wholesome proteins for vegetarian sandwiches, I rarely think to use egg! 
The flavor combination is not uncommon, I did leave off the soppressata and opted to use tomatoes, completing the caprese trio. The fresh mozzarella melts perfectly and is so smooth and stretchy. However, what really makes this sandwich come to life is his Shasha Sauce.


When I was growing up, we moved into a newly constructed house on a culdesac in the quaint town of St. James, NY. Our address was 2 Tusa Court... so simple! I don't understand why houses have to have so many digits these days... but I digress.

The second family to move in (yes, at 4 Tusa Court) and had a daughter and son who were a bit older than my older sister and me. Our families got along really well, and we spent many nights playing together. Kristine (my sister) looked up to Kelly, and would do whatever she told her to. She also had a little crush on Matt, who was her age. The three of them would often leave me out, or give me the bad jobs when we were playing. For example, when they played hospital, Kelly would be doctor, Matt would be patient, Kristine would be nurse, and I was the toilet bowl cleaner. And my mom wonders why it's my least favorite chore... I've been doing it since I was 5! 

One of our favorite things (which I'm sure our parents loved) was a game called "mix random condiments in a glass and make Ashlee drink it." It would always start with pickles or pickle juice, and then go as far as toothpaste or paper towel bits.... but I drank it! 

As I was making the Shasha Sauce, I was reminded of those drinks I was forced to drink. Banana peppers, vinegar, sugar, garlic, mustard.... what?! It's definitely something I would never, ever think to create. It's essentially a tangy, sweet, spicy banana pepper spread, but the layers of flavor are so much deeper than a smear of mustard and a few picked peppers. 

He says it has a month long shelf life in the fridge, so mine is in a jar in there. And every time I see it, I can't help but laugh and remember my poor, 6 year old self drinking toothpaste and pickle shakes...

Caprese Fried Egg Sandwich with Shasha Sauce
from Live to Cook by Michael Symon

2 slices sourdough bread (I used Kalamata Olive Sourdough from Whole Foods Bakery)
2 eggs
2 slices fresh mozzarella
1 slice of paper thin red onion
2 small tomatoes, sliced
10 basil leaves

Shasha Sauce:
1 1/2 c. banana pepper rings in vinegar
2 garlic cloves, smashed
1/2 c. yellow mustard
1/4 c. pure cane sugar
1/4 c. AP flour
1/2 c. water

First, make Shasha Sauce.
Add banana peppers, garlic and mustard to a blender, puree.
Add to a small stock pot, heat over high.
Add sugar, stir to dissolve.
Whisk flour and water in a small dish, pour into sauce pot, stir to combine.
Turn heat to low, cook for 15 minutes, stirring every few minutes.
Cool, pour into a jar and keep in the refrigerator for up to a month.

Heat a frying pan over medium heat, butter and crack in eggs.
Fry to desired doneness, flip, top with mozzarella, cover and turn heat off.
Toast bread, slather with Shasha sauce, eggs, tomatoes, basil and onions.
Serve warm.


Thank you to my fellow Symon Sundays participants:

Friday, August 27, 2010

Spicy Cilantro Baked Lemon Tofu Sticks


Earlier this week, I was having a discussion with my co-worker about vegetarianism and my marriage. See, he feels that poor JJ must be suffering miserably in a vegetarian home. This brought up two major issues with me. First, he automatically assumed JJ doesn't like tofu, and that how could anyone possibly be satiated by tofu in a meal. Second, he inferred that I am the only one who can cook, and what I put on the table is the only option. See, JJ is fully capable of purchasing some chicken or a steak, bringing it home, cooking it, and eating it without my assistance.  
But he doesn't.

I see two possible reasons for this. First, he doesn't really mind eating tofu, or any of the other dinners I prepare. Second, he's too busy (read: lazy, he was off the better part of the summer and made no effort to cook meat). But I think it's secret option three: a mixture of both. He's too lazy to fend for himself, he doesn't mind tofu when it's prepared to his liking, AND he's appreciative of his wife who slaves over a hot stove preparing dinner for us each night, and would not dream of insulting her culinary masterpieces. What? It could be true... 

JJ really has come a long way with tofu. I no longer only prepare it for myself and automatically make him chicken. Instead, I give him the option, and for the past few months he's chosen tofu. Another ingredient he's come a long way with is cilantro. I think credit should be split here between Chipotle and myself. He didn't mind a pinch here and there in salsas and as a garnish on Mexican dishes, but he can't dictate how much cilantro goes in his beloved Chipotle Corn Salsa. So slowly but surely, he's built up his cilantro love (ok, tolerance) to where he actually enjoyed this cilantro-marinated and then crusted tofu. 
This marinade and resulting crust on the tofu was flavorful and spicy, bright and fresh. I definitely would double or triple this in the future, and keep the leftovers in the fridge for topping big summer salads for a no-cook meal. 

Oh, and I did bring in some tofu for Mr. Coworker to try, and he loved it. 
This is what a victory is in my life! 

VBS Tips and Trades:
-If you haven't planned ahead and frozen the tofu overnight, it's no problem to just press it once and then marinade and cook. My husband actually told me he likes the one-press preparation better than the press, freeze, press method.
-This recipe can be made with other herbs, if you're not on Team Cilantro. Or, for less cilantro bite, try using half flat leaf parsley, half cilantro.
-I like to buy extra firm tofu cakes, they stand up best to pressing, cutting, marinading and tossing, but firm will work as well, just be careful! 

Spicy Cilantro Baked Lemon Tofu Sticks
adapted from Moosewood Restaurant New Classics

1 extra firm tofu cake
Juice of 1 lemon
2 tbsp. soy sauce
1 tbsp. canola oil
1/2 c. packed cilantro
1 scallion stalk, chopped
1/2 tsp. cayenne pepper
salt and pepper

Press tofu cake for 10 minutes, drain water.
Place in a small freezer safe bag, freeze overnight.
Thaw (either in the fridge for 8 hours or in the microwave on defrost for 2 minutes) and press again for another 10 minutes.
Preheat oven to 400*
Add all marinade ingredients to a blender, puree until smooth.
Add water 1 tbsp. at a time to thin, if necessary.
Slice tofu cake into matchsticks, place in a bowl and pour in marinade.
Set aside for 10 minutes.
Line a baking sheet with foil, spray with nonstick spray.
Lay tofu pieces on foil, drizzle with remaining marinade.
Bake for 15 minutes, flip and bake for another 10 minutes.
Remove and eat immediately or chill and eat cool.