Monday, February 21, 2011

Bourbon Butterscotch Blondies


Over the past few years, my husband has become quite the Kentucky Straight Bourbon Connoisseur. It makes gift-giving easy, I just take him to the liquor store and let him choose, but if it was up to him we'd be there for hours! In a bit of irony, last fall we decided to go tour the Kentucky Bourbon Trail this summer when we're in Cincinnati visiting family. I never was a big bourbon drinker, but now I definitely won't be involved in the sampling! 

When I saw these bars on Erin's Food Files, I knew they would be a great contribution to a family pot-luck we had on the calendar. These bars are so easy to make, and taste wonderful. The bourbon flavor is present, but not overpowering. The butterscotch tastes like caramel and the buttery bars melt in your mouth. The hardest part to making these was waiting on JJ to decide which bourbon he could spare. In the end, he decided to go with his favorite, and the one he's got the most of, Maker's Mark. I made a double batch of these bars, and put them in a 1/2 sheet pan, so they were pretty thin. I also made them again in a 9x13 pan and they were thick and more chewy, either way is delicious! 


Butterscotch Bourbon Bars

1 c. unbleached, AP Flour
1 tsp. baking powder
1/2 tsp. salt
1  c. light brown sugar, packed
1 egg
1/4 c. butter, melted
2 tbsp. milk
1 tsp. vanilla extract
1/2 c. butterscotch chips
2 tbsp. Bourbon (great with both Maker's Mark and Old Granddad, Erin recommended Bulleit as well)

Preheat oven to 350*
In a large bowl, whisk flour, baking powder, salt and brown sugar.
In a small bowl, whisk butter, milk, vanilla and egg.
Pour wet into dry, add the bourbon and chips, and stir until flour is absorbed.
(Batter will be thick, do not overmix!)
Pour into a parchment lined 9" square pan, press with a spatula into an even layer.
Place in the oven, bake for 20 minutes, using a toothpick to test the center for doneness.
Cool on a wire rack for 30 minutes, then remove from the pan and slice into bars. 

Friday, February 11, 2011

Waffles of Insane Greatness


Last week, I posted a recipe for the most delicious, fluffy and perfect Buttermilk Pancakes. I declared that I would make them every Saturday for the rest of my life. But, as we all know, I change my mind... often. And I get bored when I restrict my cooking creativity. And well, you can't blog very well when you make the same recipes over and over again, though it's tempting at times!

So I decided to try the next best thing, Buttermilk Waffles! I did a search on the food network's website and came across these Waffles of Insane Greatness. They had a 5-star rating from users, so I was confident that they would be a winner. I've never seen a waffle recipe that called for cornstarch, so I also searched the internet to find out it's purpose - to create a crisper waffle with a fluffy inside. There's nothing worse than a soggy waffle, in my opinion!

I decided to double the recipe, and store the leftover waffles in the freezer for quick mid-week breakfasts, and they only lasted about a week. With my 8" circle waffle iron, I made about 9-10 waffles by doubling the recipe.

Waffles of Insane Greatness
from foodnetwork.com, Aretha Frankenstein's Restaurant

3/4 c. All-purpose flour
1/4 c. Cornstarch
1/2 tsp. baking powder
1/4 tsp. baking soda
1/2 tsp. salt
1 c. buttermilk
1/3 c. vegetable oil
1 egg
1 1/2 tsp. sugar
3/4 tsp. vanilla extract
Butter and Syrup, for serving

In a medium bowl, combine flour, cornstarch, baking powder, baking soda and salt. Whisk.
Add the milk, vegetable oil, egg, sugar and vanilla, whisk to incorporate.
Let batter sit for 30 minutes.
Heat waffle iron (I used setting 3/4 out of 5).
Do not use nonstick spray, ladle batter onto iron and cook as waffle iron specifies.
Serve immediately with butter and syrup.

Wednesday, February 9, 2011

Tex-Mex Black Eyed Pea Dip


For Superbowl Sunday, we were invited to a family get together that was pot luck style. I signed up to make an appetizer and dessert weeks ago, and figured I'd decide what to make closer to the date. A few weeks later, I had a strange craving for Black Eyed Peas, so I bought a pound of dried beans at the grocery store. After cooking them, I ate a small bowl and then put the remaining 7-8 c. of cooked beans in the fridge. And I was stumped... what to do, what to do? 

Finally, the morning of the Superbowl, I searched the pantry and fridge for ingredients to make a dessert and appetizer, and kept coming back to the Black Eyes Peas. Surely  there was some sort of dip or croquette I could make with them, so I did a little google-ing. I found a Paula Deen recipe that was shockingly healthy, and looked really delicious. I even had most of the ingredients on hand, so I got to work on it. I made a few changes, Paula's recipe seemed pretty basic (read: bland), so I decided to give it a Tex-Mex flavor, a cross between Chipotle's two salsas with the addition of beans. The end result was a delicious, fresh salsa/dip that was perfect with Tostitos scoops chips! This also made a little over 2 quarts of dip, so it was plentiful.

Note: I highly recommend cooking dried beans for this, canned tend to be mushy, and for this dip you want the peas to hold their shape and have a bit of a bite. I simply added 1 lb. beans to 8 c. salted water, brought to a boil, reduced and simmered for 45 minutes/1 hour, drained, cooled and stored in the refrigerator. 

Tex-Mex Black Eyed Pea Dip
heavily adapted from Paula Deen

3/4 lb. dried Black Eyed Peas, cooked
2 c. frozen corn kernels
1 pint cherry tomatoes, quartered
1 green bell pepper, finely diced
1 red bell pepper, finely diced
4 scallions, minced (or 1/4 red onion)
1/2 c. roughly chopped cilantro
1 small jalapeƱo, seeded and minced

dressing:
1 garlic clove, pasted with salt
Juice of 1 lime
1/4 c. red wine vinegar
1 tsp. chili powder
1 tsp. ground cumin
1 tsp. honey
1/2 c. EVOO
Kosher salt and black pepper, to taste

Add all salad ingredients to a large plastic storage container or serving bowl.
In a small bowl, whisk together garlic, lime juice, vinegar, chili powder, cumin and honey.
Slowly add EVOO, whisking constantly.
Taste, season with kosher salt and pepper.
Add dressing to the dip, toss well and refrigerate for at least an hour.
Toss well before serving, chilled, with scoops chips. 

Monday, February 7, 2011

Blue Cheese and Walnut Crackers


A few weeks ago, my mother in law gave me a 1 lb. tub of Amish Blue Cheese crumbles. While I've read conflicting reports about whether you can eat blue cheese or not when pregnant, it didn't even sound appetizing to me. So the cheese sat in the fridge for a couple of weeks, untouched. During my month-long stint watching Food Network and eating only bagels, I saw a holiday appetizer episode where Ina baked savory blue cheese shortbread crackers. The recipe called for 8 oz. of cheese, which I knew would make a substantial dent in the tub of crumbles, and it would cook the cheese so there wouldn't be the question of whether or not I could eat it. 

These crackers take very few ingredients, in fact I had all of the ingredients on hand last Saturday when I was cleaning out the fridge and came across the blue cheese hidden in the back. After making the dough, it needs to be formed into a log and chilled, so these crackers can be made ahead of time for a party, and kept in the freezer for slicing and baking at any time - even just for a snack! I was worried that the blue cheese would be too strong, or they would taste too much like a cookie gone bad, but they were outstanding! The bite of the blue cheese was dulled down, but still present, the nuts added a nice crunch, and the pepper reinforced the savory flavor. They were reminiscent of a cheese straw or a really fancy Cheez-It! 

As for the actual recipe, the only changes I made were subbing 1/2 c. whole wheat pastry flour for 1/2 c. of the all purpose, and omitting an egg wash for adhering the nuts, I had no trouble getting them to stick when pressing firmly. While the crackers were exceptional on their own, I couldn't help but think some kind of dip, smear, or spread would pair with it, but I couldn't think of anything that wouldn't make these too heavy, or too overpowering. My husband said buffalo chicken dip... any ideas? 

Blue Cheese and Walnut Crackers

1/4 lb. (1 stick) unsalted butter at room temperature
8 oz. blue cheese, at room temperature 
1 c. all-purpose flour
1/2 c. whole wheat pastry flour
2 tsp. kosher salt
1 tsp. fresh ground black pepper
1/2 c. chopped walnuts

In the bowl of a mixer with the paddle attachment, cream together butter and blue cheese for 1 minutes, or until smooth.
With the mixer on low speed, add the flours, salt and pepper and mix until dough comes together, adding water 1 tsp. at a time if necessary (I added 2 tsp.)
Place a piece of plastic wrap on the counter, use a spatula to remove dough from the bowl and onto the saran wrap. 
Using your fingers, form into a log about 12" long and 2" wide, wrap tightly and place in the refrigerator until you're ready to bake the crackers, or double wrap in foil and freeze.
After at least 1 hour, preheat oven to 350*
Unwrap dough log and sprinkle walnuts around the log, turn the log and press down on the nuts to encase the surface.
Line a baking sheet with parchment, slice the dough into 1/4" rounds and place 1" apart on the baking sheet, you should get around 30-36 crackers.
Place the crackers in the oven and bake for 22-25 minutes, rotating the baking sheet halfway through.
Using a spatula, place crackers on a wire cooling rack, and cool for at least an hour so crackers begin to harden. 
To store, place in an unsealed plastic bag or in an uncovered plastic storage container, sealing or covering will cause the crackers to soften, serve within a day or freeze baked crackers. 

Friday, February 4, 2011

Buttermilk Pancakes


When it comes to breakfast, I much prefer savory over sweet. I think in my mind, loading up on sugar and carbs early makes me lethargic the rest of the day, so I rarely make things like pancakes, waffles, crepes, french toast, etc. I know these things can be made healthful with whole grains, fruit and added protein, but if I'm going to indulge at breakfast or brunch, it's going to be a cheesy omelette and hash browns. 

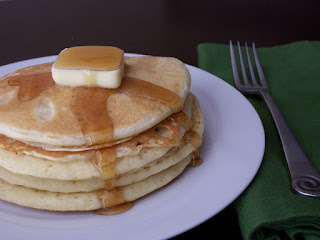
However, pregnancy has my tastes quite mixed up! Some of my favorite foods are now aversions, like brussels sprouts, dark greens, and tomato-ey dishes. I saw a commercial for Ihop's all you can eat pancakes, and almost grabbed my keys and bolted for the car. All week long, pancakes were all I could think about! I sent out a request for a standard, light and fluffy buttermilk pancake recipe, and Brianna from Oishii delivered with The Buttermilk Pancakes from her Childhood. They were absolutely perfect, light, fluffy, slightly tangy and not at all sweet, so with my addition of a little pure maple syrup, it was perfect! I used a white whole wheat flour, which made them slightly healthier, and canola oil rather than butter, but these still felt like and tasted like an indulgence. 

The Buttermilk Pancakes from my Childhood

1 c. unbleached AP flour
1/2 tsp. salt
1/2 tsp. baking soda
1 egg, slightly beaten
1 tbsp. canola oil
1 c. lowfat buttermilk
Nonstick cooking spray

Optional toppers:
Pure maple syrup
Butter
Fruit (I added sliced peaches)

Heat a griddle over medium heat (I used the 350* setting)
In a medium mixing bowl, whisk together flour, salt and baking soda.
In a small mixing bowl, whisk together egg, canola oil and buttermilk.
Add wet ingredients to dry, whisk until flour is absorbed, set aside while griddle heats.
Spray griddle with nonstick spray, ladle batter onto griddle.
Cook for 4-5 minutes, flip and cook for another 2-3 minutes.
Remove from the griddle and serve.
Yields 7-8 4" pancakes

Tuesday, February 1, 2011

Seven-Layer Cookies


I am a visual person; I remember directions by sight, things I read and math problems solved on the chalkboard. I'm often flooded with memories by the simple sight or mention of an ingredient, food, or other tangible item. When my friend Jen asked if there was a bakery in Jacksonville that made her beloved Seven-Layer Cookies, I did a google search to see what she was talking about. One glance at the cakey, striped cookies encased in chocolate and I was standing in my Nanny and Grandpa's kitchen, eying up the assorted cookie platter Grandpa brought home from the bakery. I can still remember picking out a cookie, placing it on a paper towel and sitting at the kitchen table, always covered in a plastic, seasonal table cloth, and eating it with a juice box to drink.

I found Grandpa's recipe from the bakery in his stack of note cards, but as all of the recipes are, it was measured in 20 lbs. of butter, 30 lbs. of flour, and 25 lbs. or sugar, enough for thousands of cookies. Luckily, I had remembered seeing the cookies on Joanne's blog back in December, so I pulled up the recipe, originally from Gourmet. These cookies aren't something you can make on a whim, they take some planning and time, but it's well worth it. I had great luck with the chilled cookies slicing well, I just didn't really measure them out, I like the random shapes and sizes! One change I did make was substituting the apricot jam layer between the red and white cookies with raspberry (seedless) per Jen's request.

Seven-Layer Cookies (Italian Rainbow/Flag Cookies)

4 large eggs, separated
1 c. sugar
1 8-oz. can almond paste
2 1/2 sticks butter, softened
1 tsp. almond extract
2 c. all purpose flour
1/2 tsp. salt
25 drops red food coloring
25 drops green food coloring
1/2 c. apricot preserves
1/2 c. seedless raspberry preserves
7 oz. bittersweet chocolate

Place a rack in the center of the oven, preheat to 350*
Butter a 9" baking pan, line the bottom with parchment leaving overhang on the sides, butter paper.
Beat egg whites in a mixer with the whisk attachment on medium-high until stiff peaks form.
Add 1/4 c. of sugar, a little at a time, transfer to another bowl.
Switch to the paddle attachment, add butter, almond paste and remaining 3/4 c. sugar, beat until light and fluffy, about 3 minutes.
Add yolks and almond extract, beat until combined.
Reduce speed to low, add flour and salt, mix until just combined.
Fold half of the egg white mixture in gently but thoroughly, then the rest.
Divide batter into 3 bowls, dye one red and one green, leave one white.
Set red and white aside, place green in the refrigerator.
Pour red into the prepared pan, spread out in an even layer with an offset spatula.
Bake for 10 minutes, until set, it will look undercooked.
Transfer to a wire cooling rack, reline pan with parchment, butter and add white batter.
Remove green batter from the refrigerator.
Spread white batter in an even layer, and bake for 8-10 minutes, until set.
Transfer on parchment to a wire cooling rack.
Repeat with green batter (do not stack layers on parchment/racks, use 3 separate racks).
Warm the raspberry preserves so it's spreadable, then spread over red layer in a thin, even layer.
Peel parchment from white layer, and stack on top of red layer/jam.
Warm apricot preserves and spread over white layer, removing any large pieces.
Peel parchment off green layer, and press on top.
Wrap the three filled layers tightly in saran wrap, and refrigerate overnight with a weighted sheet pan on top.
The next day, heat chocolate over a double boiler until melted.
Peel back saran wrap from one side, spread evenly which chocolate in a thin layer, place back in the refrigerator for 10 minutes.
When chocolate is chilled and set, gently flip cookies and spread chocolate on the opposite side in an even layer.
Place back in the refrigerator until set, about 10 minutes.
With a serrated knife, cut cookies into 1" cubes, and place on a serving platter (or keep cookies refrigerated until ready to cut and serve, cookies cut best when chilled).
Yield around 64 cookies, depending on size.